
Five steps, start to finish: start a campaign, fill in its details, write the email, save it, then review and send it. Here's each one, in order.
Step 1: Start a new campaign
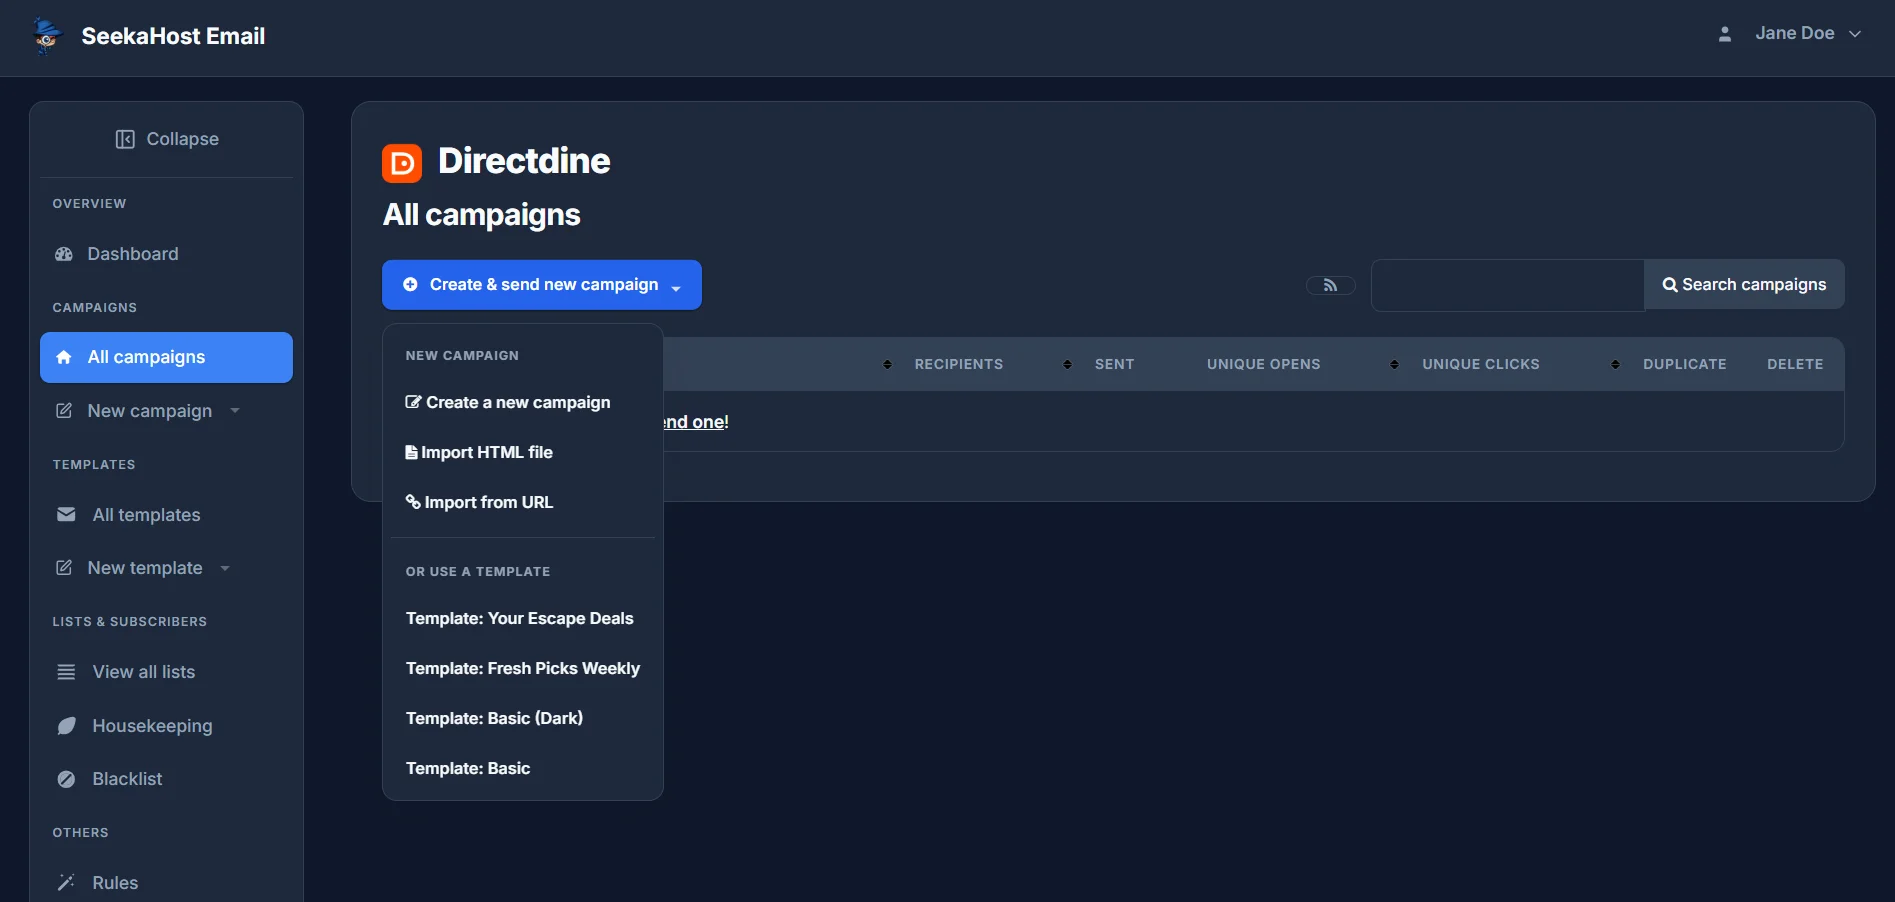
Click Create & send new campaign from All campaigns, or New campaign in the sidebar - both open the same menu. You've got four ways to start:
- Create a new campaign - a blank email, built from nothing.
- Import HTML file - upload an HTML file you already have.
- Import from URL - pull in an email's content from a web address.
- Use a template - start from one of your own saved templates, already laid out.
Step 2: Fill in the campaign details
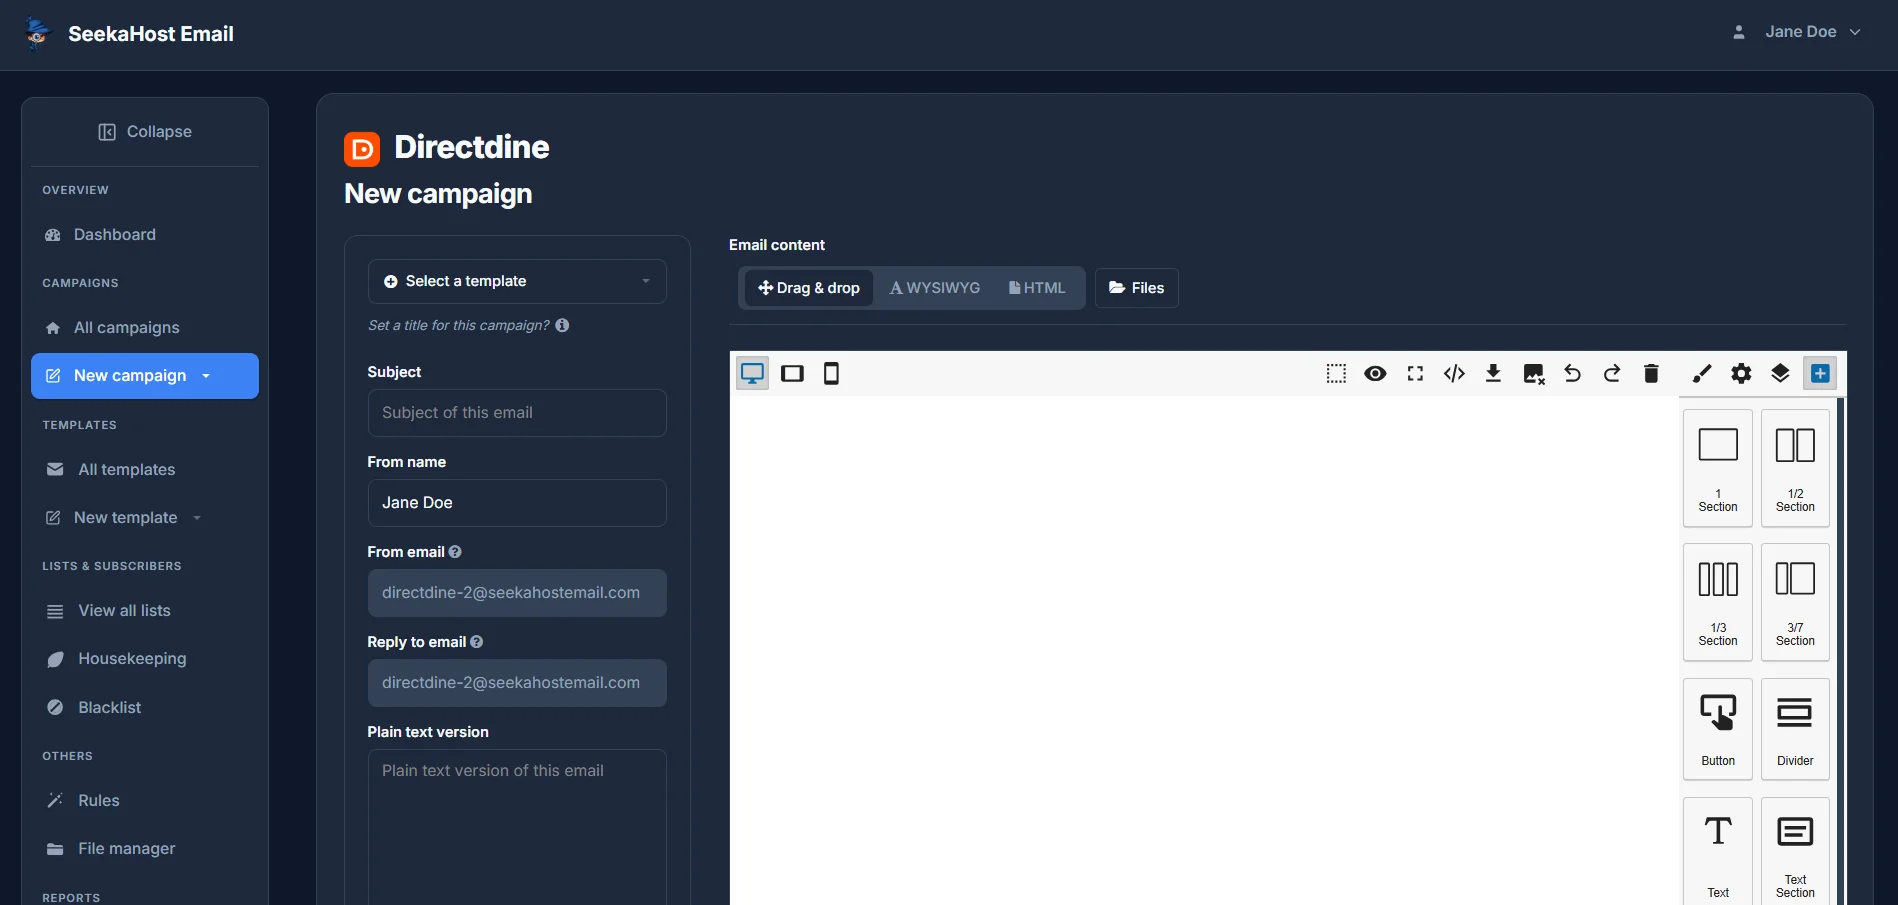
This opens the New campaign page. The left-hand panel is a form - here's everything on it, top to bottom.
- Select a template - change your mind? Pick a different saved template from here without starting over.
- Title - click "Set a title for this campaign?" to open a field and name it. This is just for you - it's what shows up in your All campaigns list, and it's not shown to recipients.
- Subject - this is what recipients actually see as the email's subject line.
- From name and From email - who it's from. From email is pre-filled with your verified sending identity and can't be changed here.
- Reply to email - where replies go. Also pre-filled from your sending identity.
- Plain text version - optional, but worth filling in alongside the HTML version for recipients whose inbox prefers plain text.
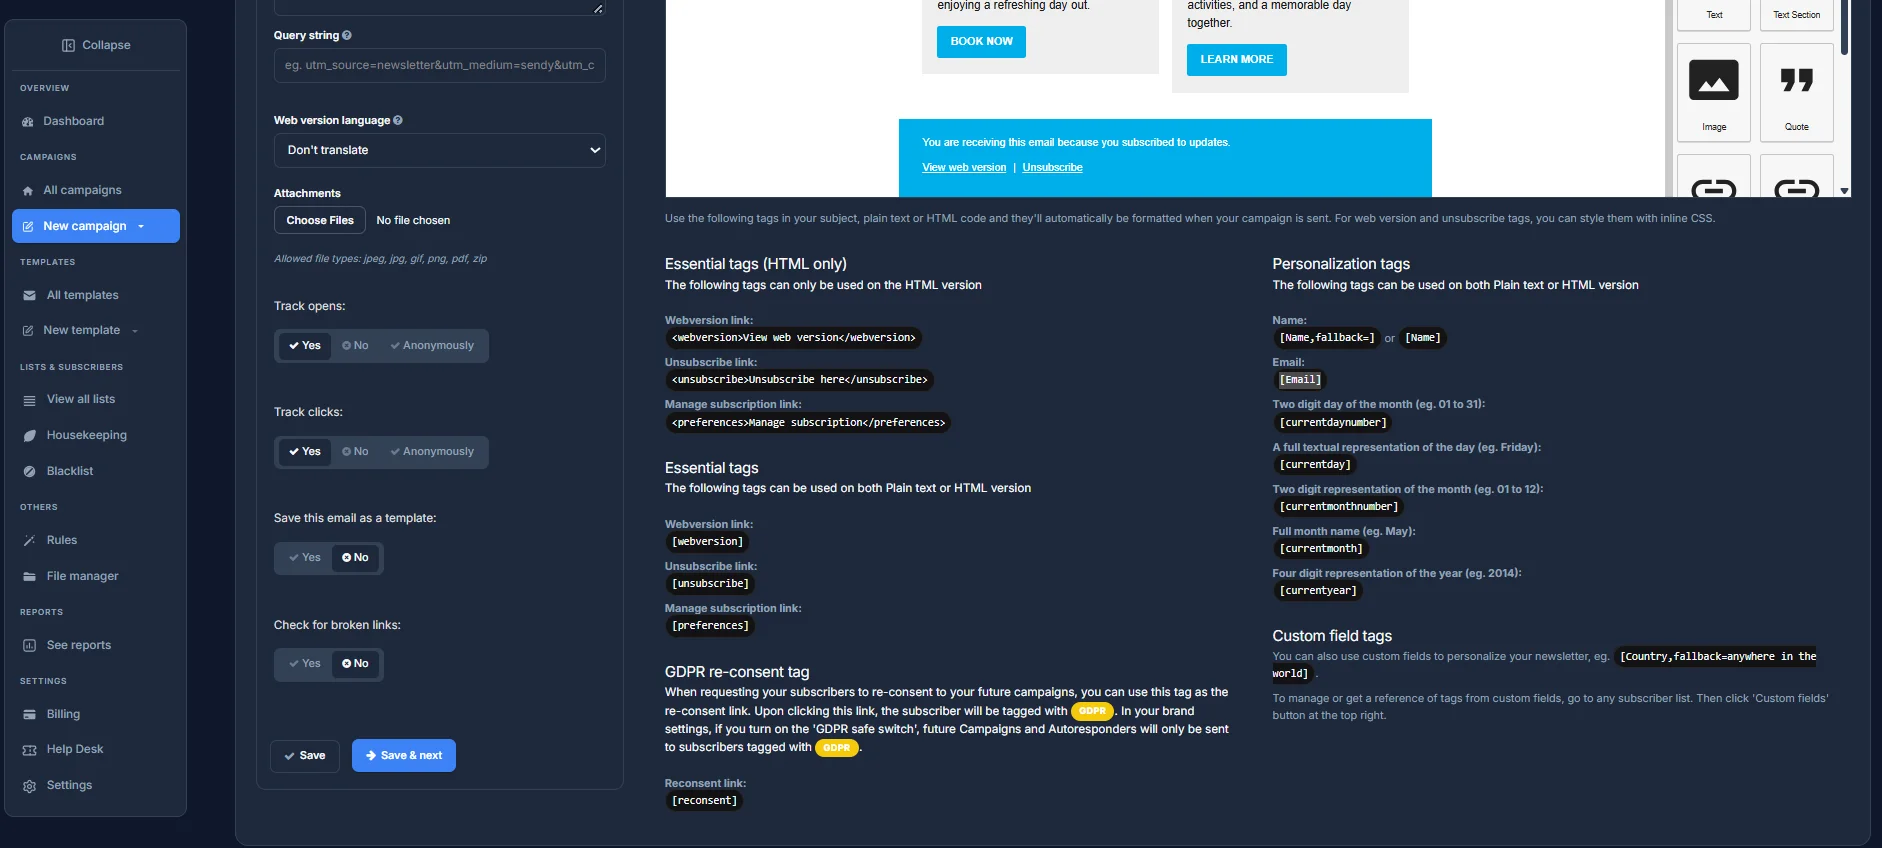
Scroll down the same form and you'll find a few more settings:
- Query string - appends UTM tracking parameters to every link in the email automatically, so this campaign's traffic shows up in your own analytics tool without editing each link by hand.
- Web version language - controls what language the "View in browser" link itself is shown in, or leave it as is.
- Attachments - attach a file to the email, the same as you would on a normal email.
- Track opens / Track clicks - two separate settings, each with three choices: Yes tracks it against the individual subscriber, No doesn't track it at all, and Anonymously counts it in your totals without tying it back to who specifically opened or clicked.
- Save this email as a template - also saves a copy of this design as a reusable template, on top of sending the campaign itself.
- Check for broken links - scans every link in the email before you send, so you catch a dead one before your subscribers do.
Right next to those settings is a full reference of merge tags you can drop into your subject, plain text or HTML - personalization tags like [Name] and [Email], essential tags for the web version and unsubscribe links, a GDPR re-consent tag, and custom field tags for anything specific to your own subscriber list.
Step 3: Write the email
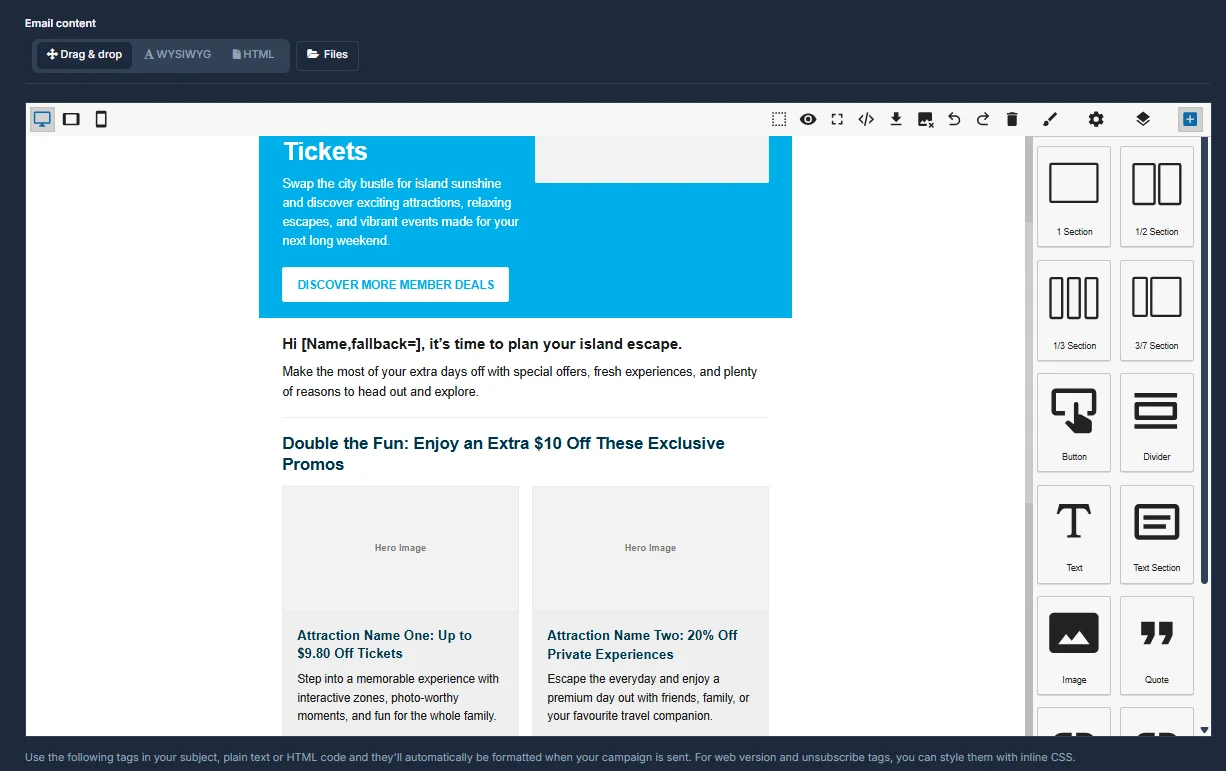
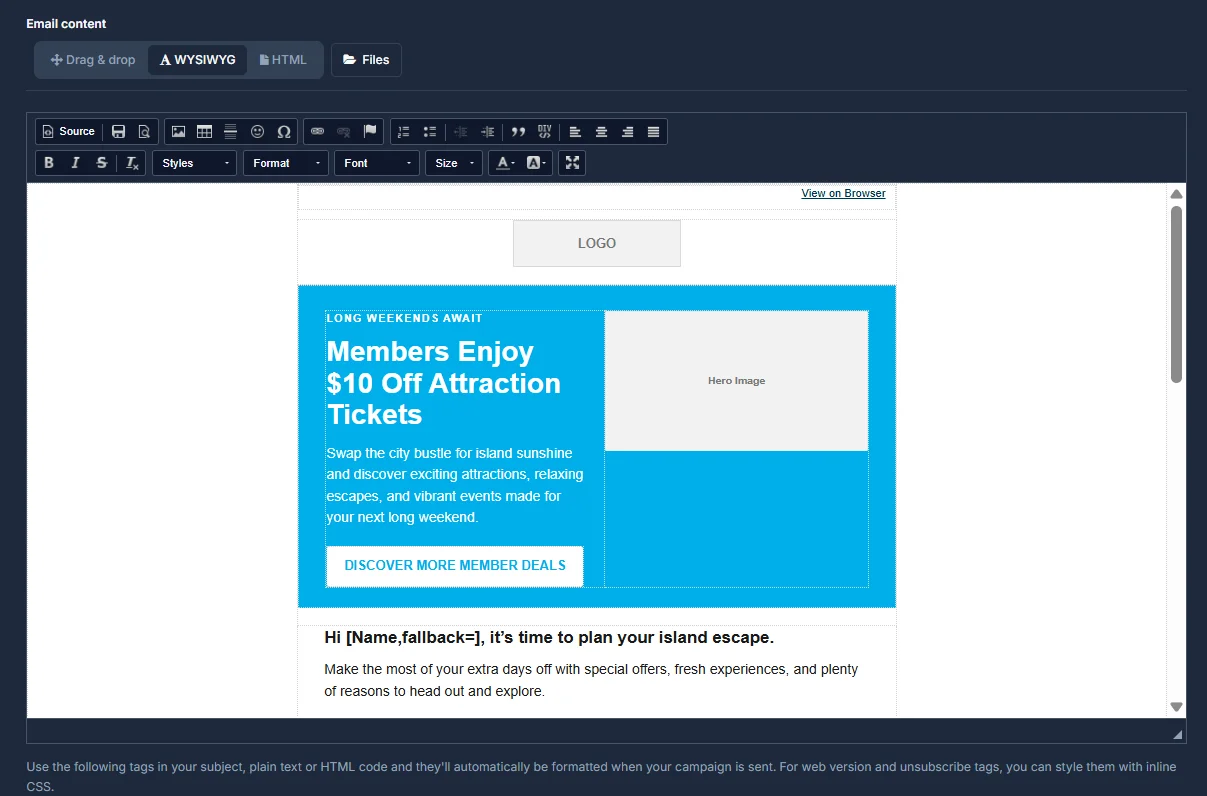
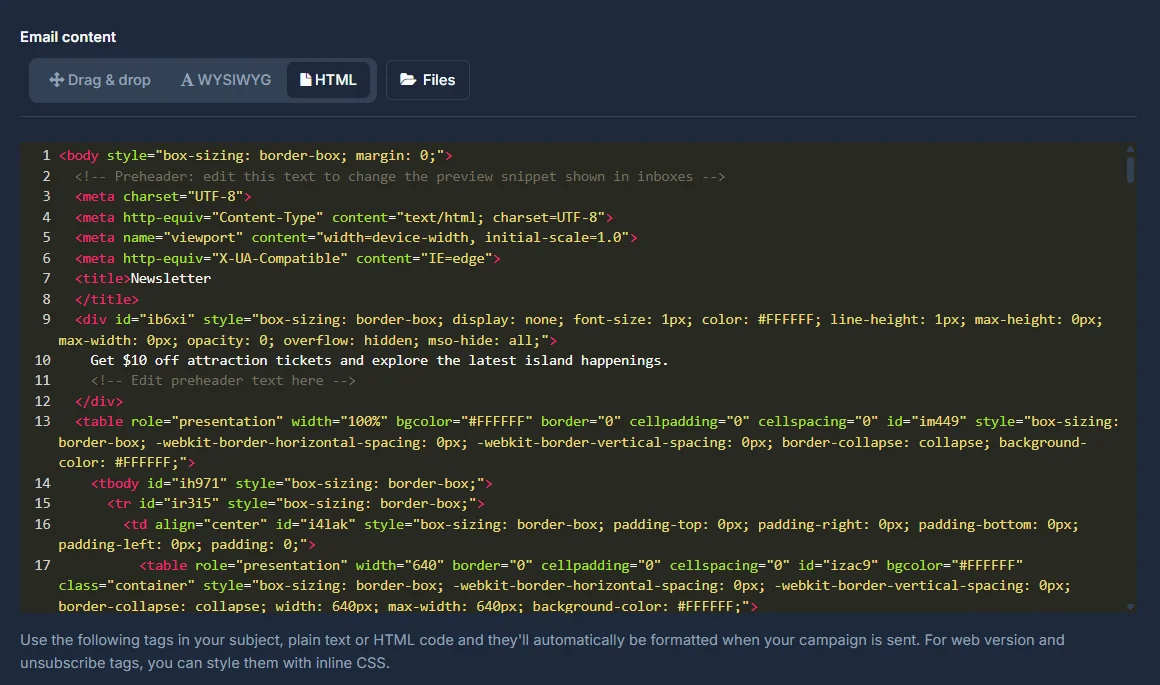
On the right-hand side of the same page is Email content, with three different ways to build the same email, plus a Files tab for anything you've uploaded:
- Drag & drop - a section-based visual builder. If you started from a template, this is where it loads in, ready to edit.
- WYSIWYG - a simpler rich text editor, closer to a word processor.
- HTML - the raw source code, for full control.
All three edit the same underlying email - switching tabs doesn't lose your work, it just shows it a different way.
Step 4: Save your campaign
Once the details and content are filled in, you have two buttons:
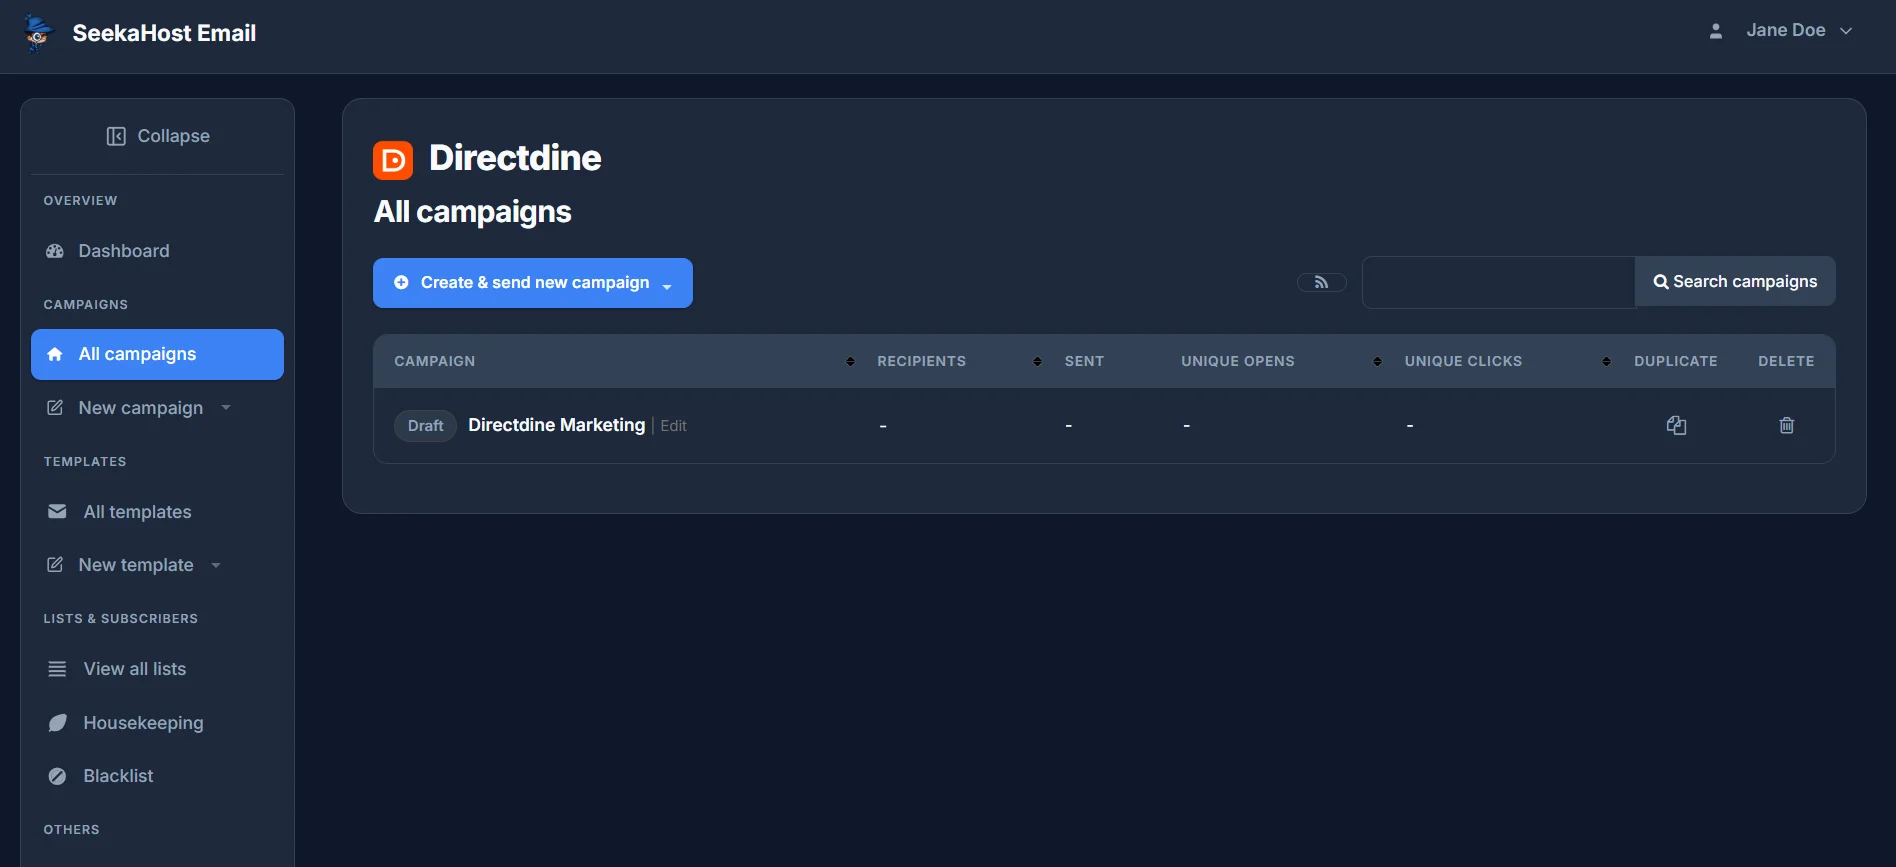
- Save - keeps it as a Draft in All campaigns. Nothing is sent; come back and click Edit whenever you're ready to continue.
- Save & next - saves it the same way, and takes you straight on to Step 5 below.
Step 5: Review, choose recipients, and send
This is a single screen that brings together everything left to do before this campaign actually goes out.
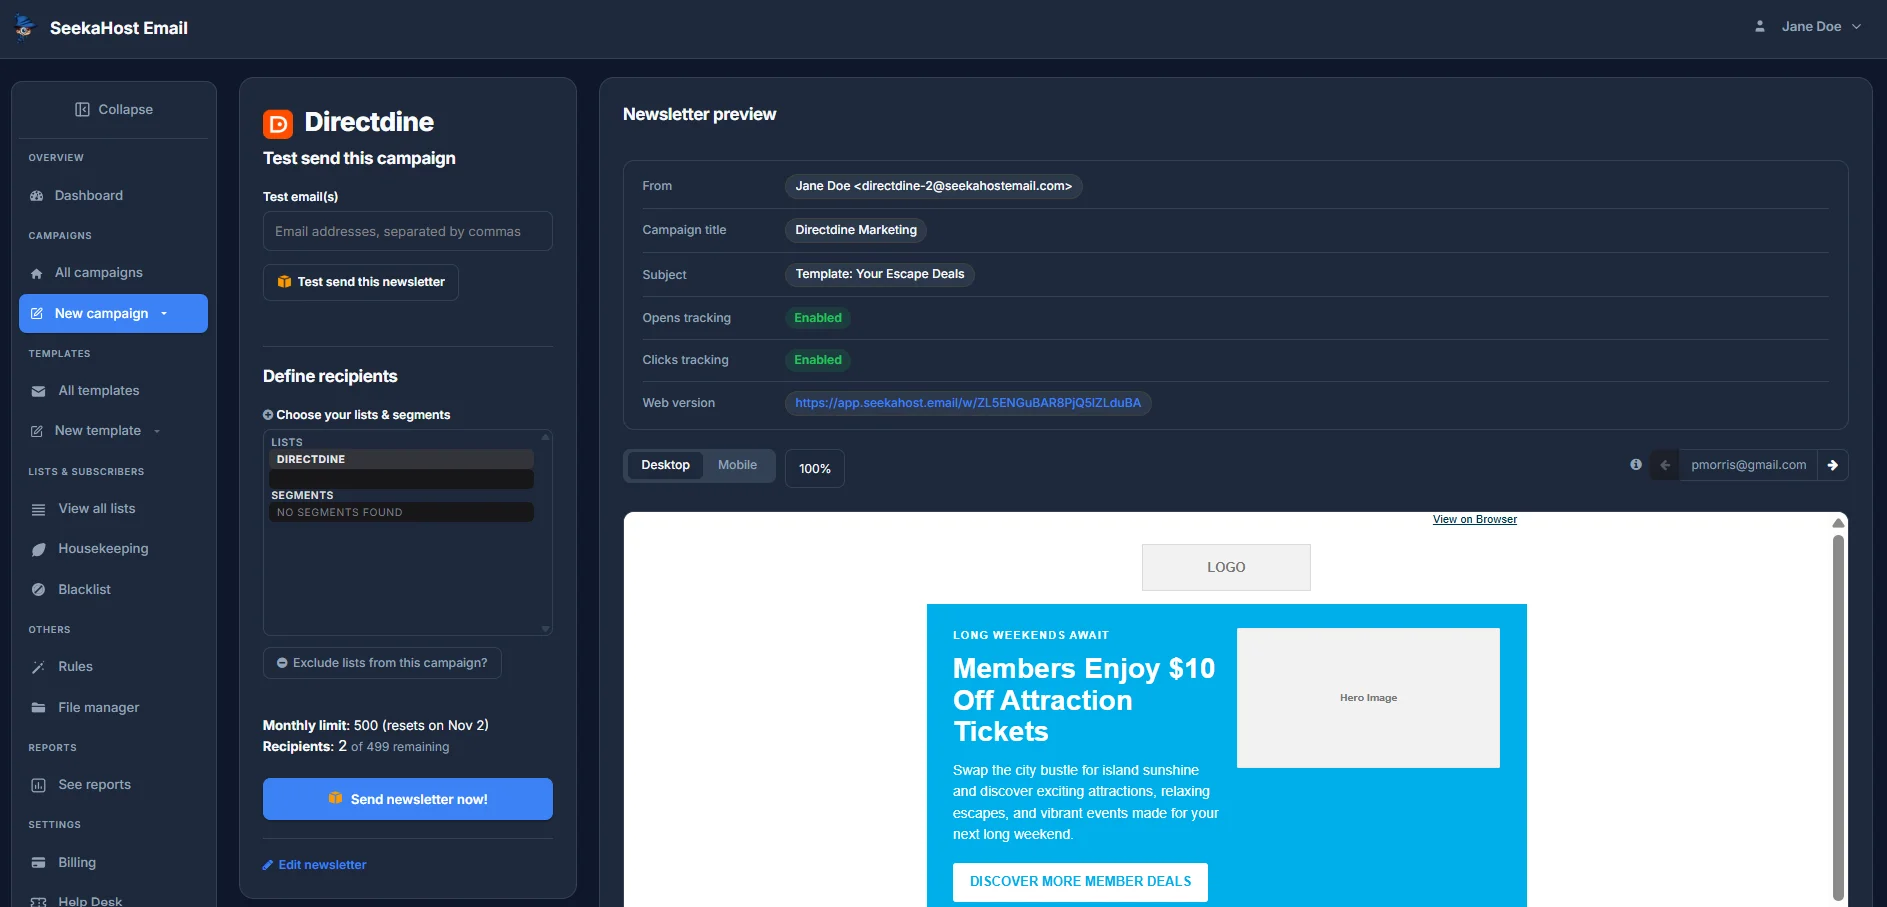
Start with Test send this campaign - send it to your own address so you can see exactly what recipients will get before anyone else does.
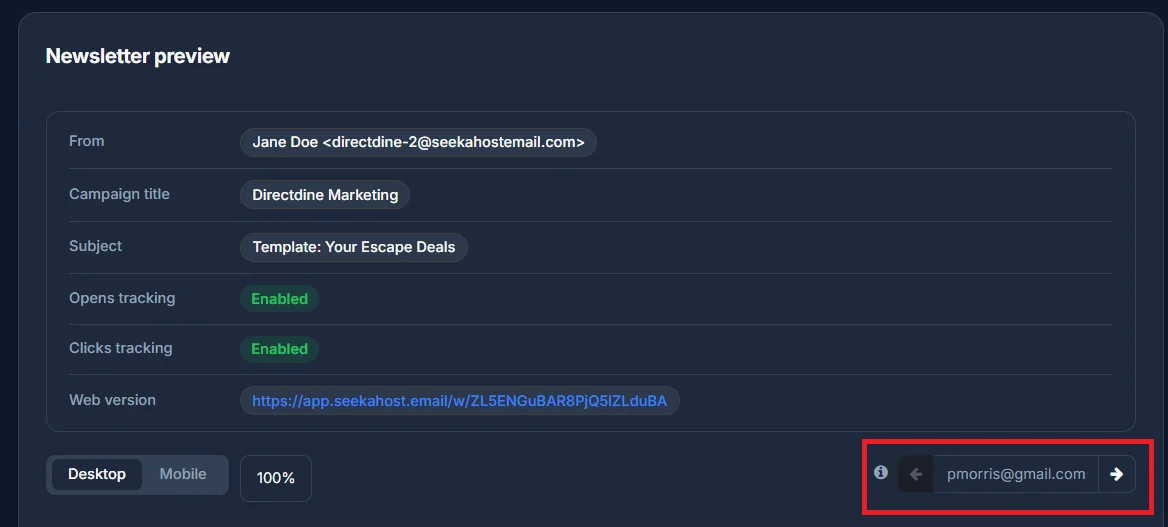
Next, check Newsletter preview on the right: your From address, campaign title, subject, and whether opens/clicks tracking is on, plus a link to the web version. Switch between Desktop and Mobile and adjust the zoom to check the layout looks right on both - and use the arrows to page through the real subscriber addresses this campaign is about to be sent to.
Under Define recipients, choose which list to send to. If that list has segments, you can target one specific segment instead of the whole list - if it doesn't, you'll just see "No segments found". Click "Exclude lists from this campaign?" to also rule out a list or segment, separate from who you're including.
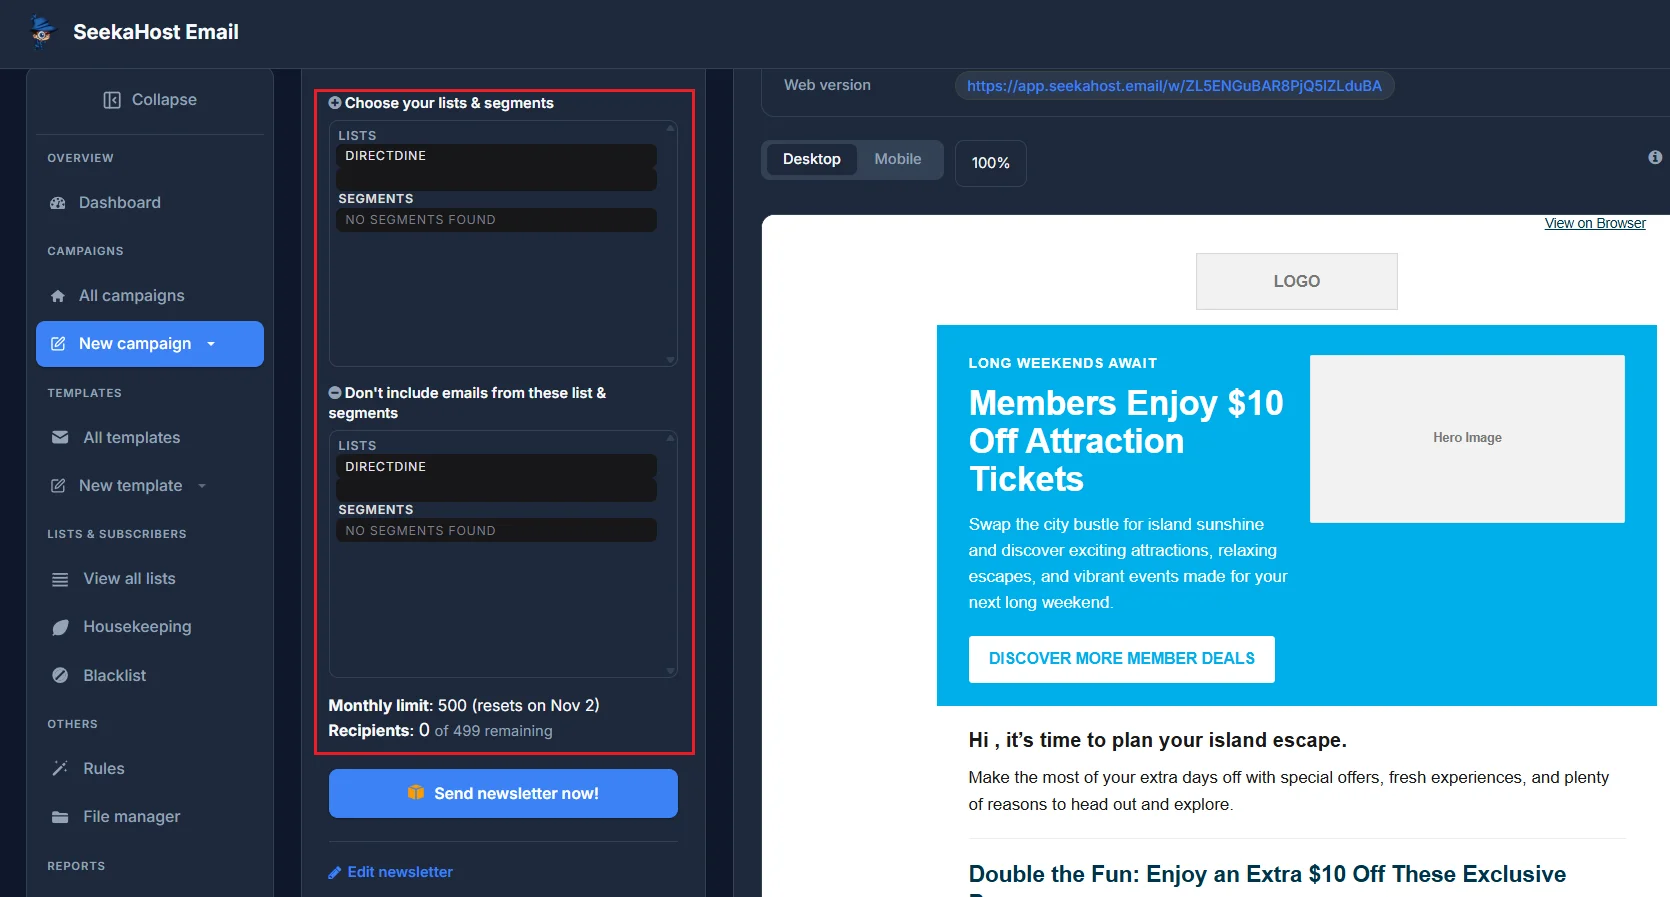
Above the Send newsletter now! button, you'll see your monthly sending limit and how many recipients you have left for this billing period. Once everything looks right, click Send newsletter now! to send it for real.